SiteManager - Image
NOTE: Accepted File Types: JPG, GIF, and PNG
There are two ways to add images:
- In their own Content module:
- Click on the Add Content to Main Content button and select the Image module.
- Mouse over the module and click on Edit.
- Click on Select Image and search for or upload your image.
- Add a name; describe the image in this field for users of assistive devices.
- NOTE: This is also the required alt text field.
- Add a caption (should be short and informative).
- You can add a link to another page that the viewer will be redirected to if they click on the image (if applicable).
- Select the Full Size option if you want the full image to open in a pop-up when clicked on.
- Click on Save.

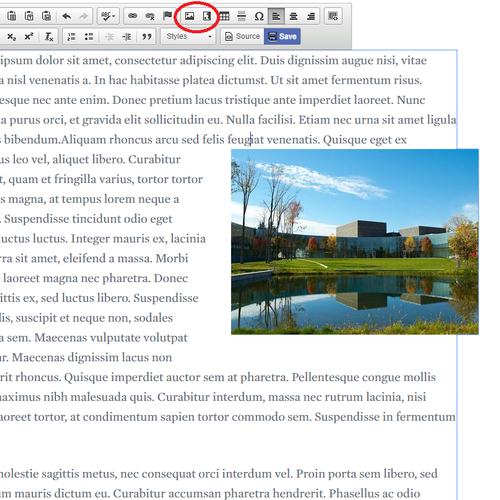
- Within a Text module (e.g. if you want your text to flow around an image):
- Click on one of the Image buttons on the toolbar within the text editor and search for or upload your images.
- If you are inserting an image in landscape, choose the first Image button.
If you are inserting an image in portrait, choose the second Image button. - Instructions on adding new media to the Web Media Library.
- The image can only be right-justified and you cannot edit the image using SiteManager.
- If you are inserting an image in landscape, choose the first Image button.
- Click Save.
- Click on one of the Image buttons on the toolbar within the text editor and search for or upload your images.

Tags
Comments
Last updated: August 31, 2021
Contact
Team Name
Help Desk
Office Location
Burke Library
198 College Hill Road
Clinton, NY 13323
198 College Hill Road
Clinton, NY 13323
Phone
Email
Hours
Mon-Thu 8 a.m. - 10 p.m.
Fri 8 a.m. - 8 p.m.
Sat - Sun 10 a.m. - 10 p.m.
Fri 8 a.m. - 8 p.m.
Sat - Sun 10 a.m. - 10 p.m.

No comments yet.
Comment Guidelines
Please log in to post a comment