Configuring Microsoft Outlook for HillConnect Mail
These instructions detail how to configure Microsoft Outlook 2010 to access Hamilton’s HillMail e-mail system (powered by Google). If you have a different version of Microsoft Outlook, these instructions can still provide some assistance.
NOTE: If you have two factor authentication turned on, you will need to generate an App Password for Outlook. If you receive an error message during the setup that reads : "Your imap server wants to alert you to the following: Please log in via your web server: https://support.google.com/mail/accounts/bin/answer.py?answer=78754(Failure)", you will need to enable access for less secure apps.
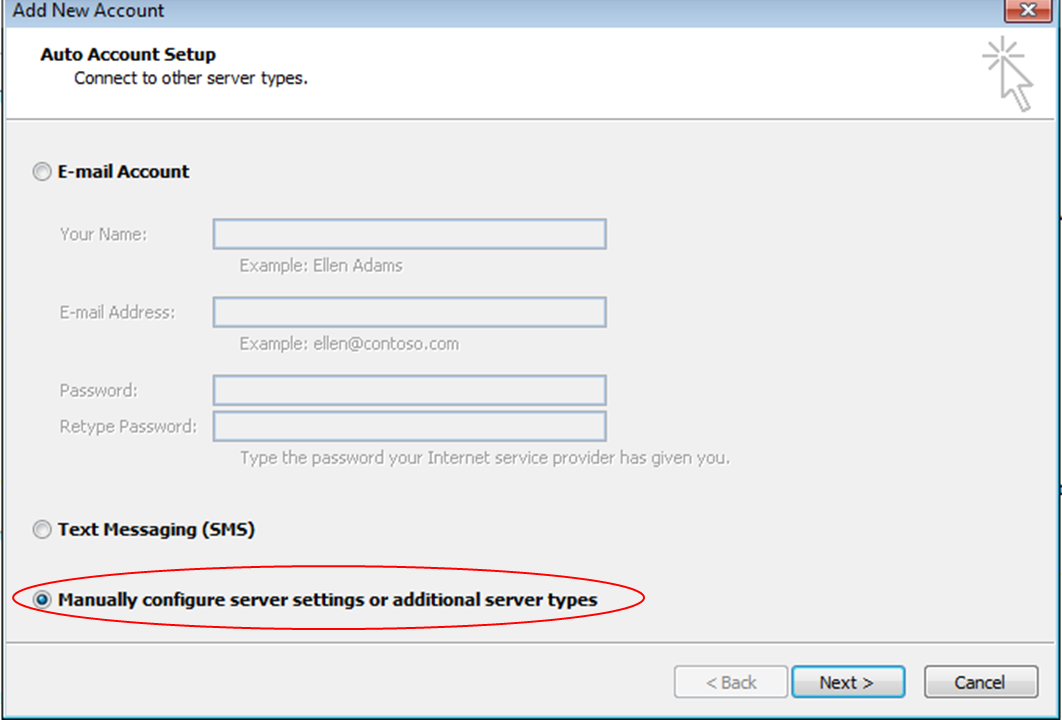
- Go to the File tab, Info, and select Add Account.

- Choose Manually configure server settings and or additional server type.
b. Click Next.
c. Select Internet E-mail.
d. Click Next.
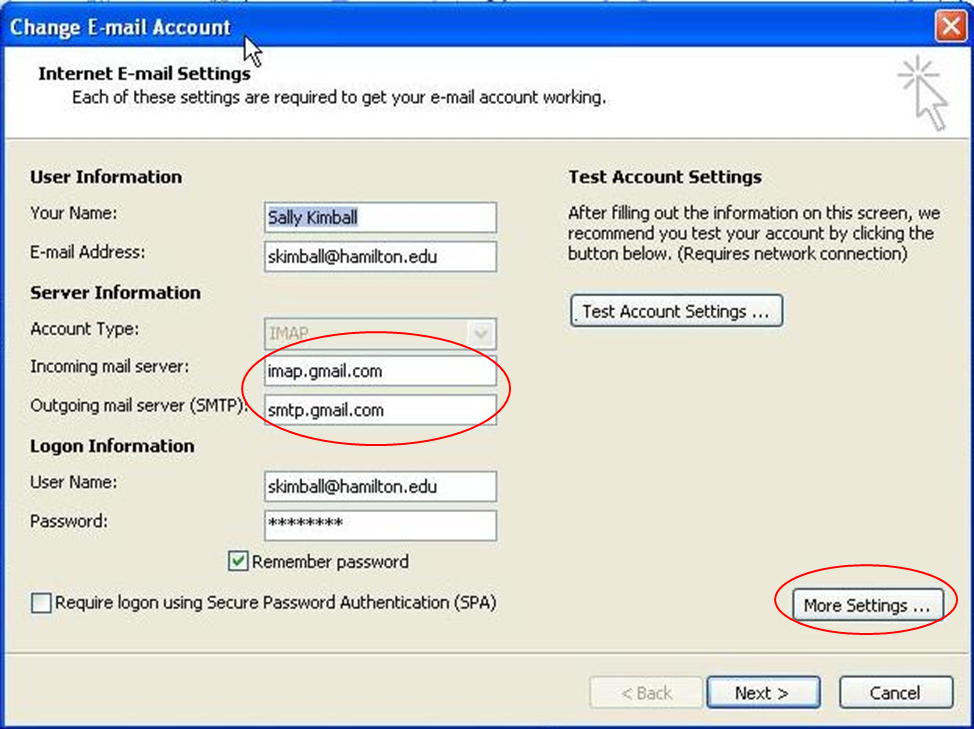
- Edit the following fields:
- Set Incoming mail server: to imap.gmail.com
- Set Outgoing mail server (SMTP): to smtp.gmail.com
- Set User Name: to username@hamilton.edu where “username” is your e-mail ID.
- Click on More Settings.
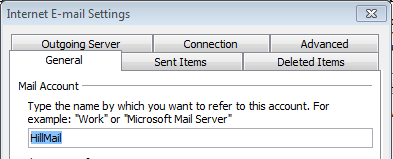
- Select the General tab and set Mail Account to HillMail.
- Click on the Outgoing Server tab.
- Check the box for: My outgoing server (SMTP) requires authentication.
- Make sure that Use same settings as my incoming mail server is selected.
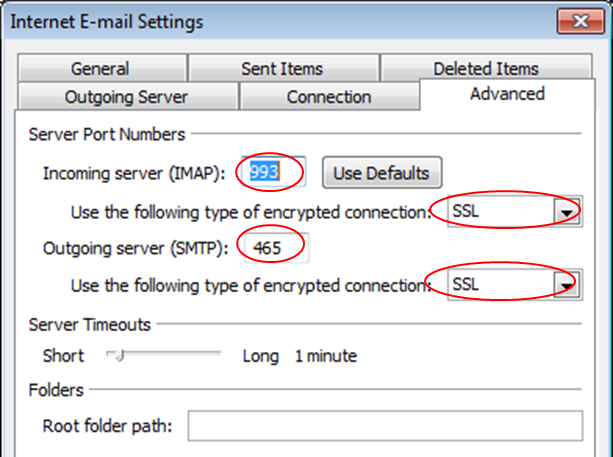
- Click on the Advanced tab.
- Set Incoming server (IMAP) to: to 993.
- Use the following type of encrypted connection: SSL.
- Set Outgoing server (SMTP): to 465.
- Use the following type of encrypted connection: SSL (Under SMTP).
- Click OK.
- Click Next.
- Click Finish.
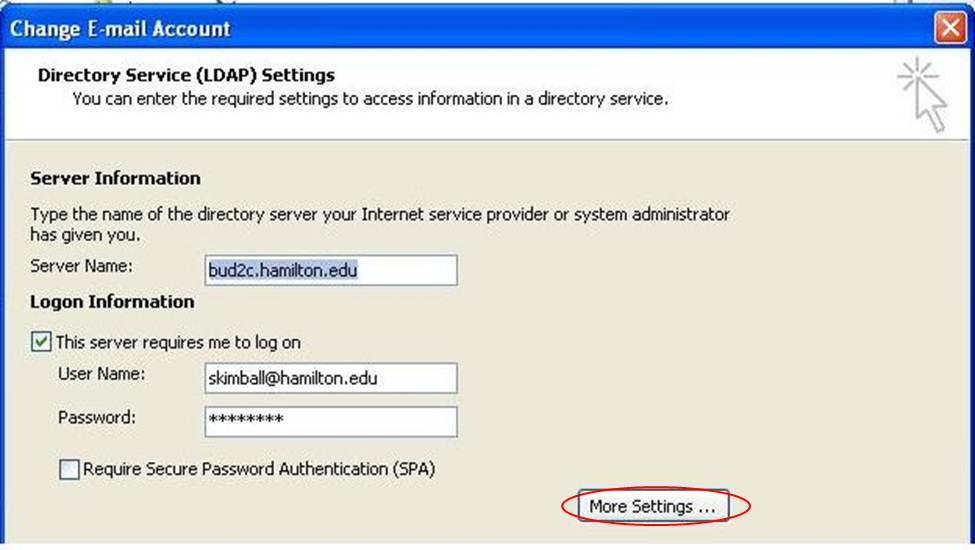
- To change the Hamilton address book settings click on File, Info and then select Account Settings and then select the Address Books tab. Click the New button and then select Internet Directory Service (LDAP) and then Next.
- Set Server Name to bud2c.hamilton.edu
- Check the box for: This server requires me to log on.
- Set User Name: to username@hamilton.edu where “username” is your e-mail ID.
- Click on More Settings.
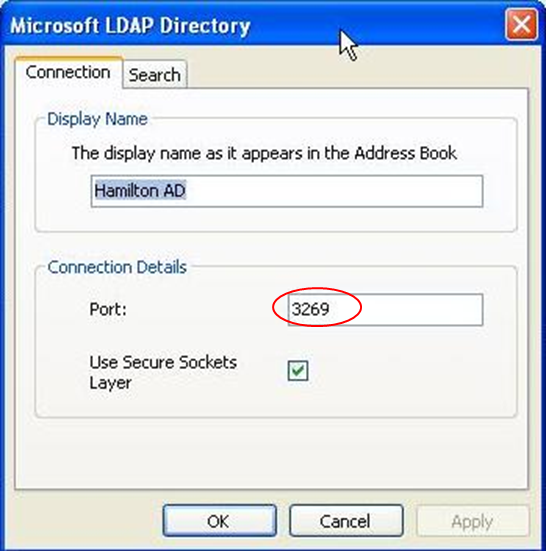
- Set Display Name: to Hamilton AD
- Set Port: to 3269
- Check the box for: Use Secure Sockets Layer.
- Click OK, Next and then Finish.
- Click Close.
- Click the Send/Receive tab, Send/Receive All Folders and type in your e-mail password. Your mail folders should populate with your Hamilton e-mail.
Fine Tune Outlook Settings for HillMail
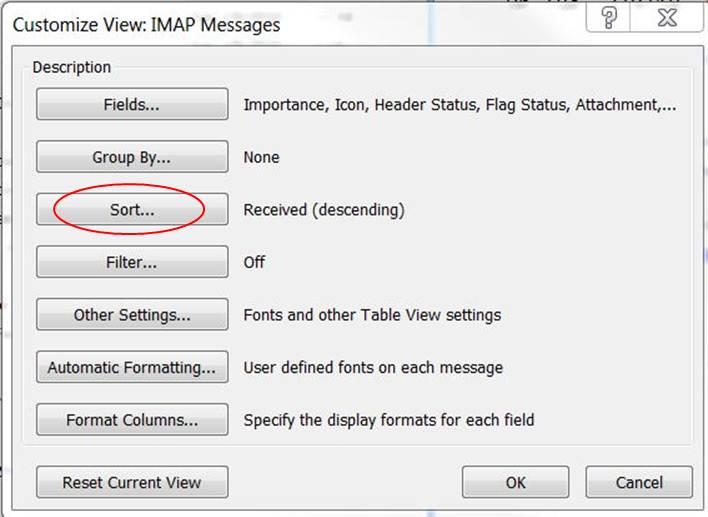
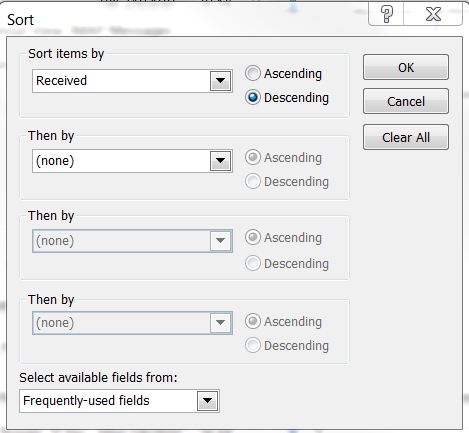
- In Outlook click on View, then View Settings. Click on the Sort... button.
- Select Sent from the drop down box.
- Verify that the radio-button for Descending is selected.
- Click OK, then Yes, then OK.
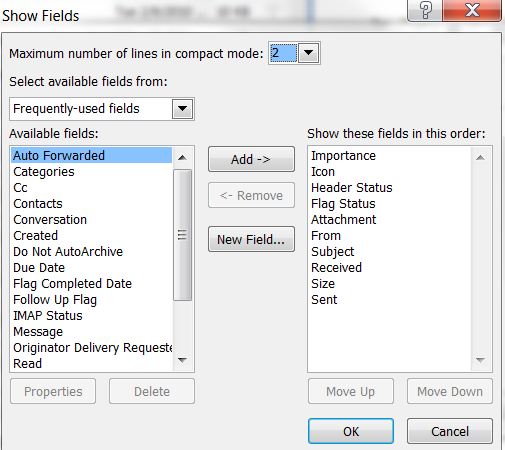
- Then click back to Columns.
- Select Received on the right hand column and select Remove.
- Then click OK.
- IMPORTANT NOTE: If you already had rules set up prior to updating Outlook to work with your HillConnect account, you might need to recreate your rules for every Hamilton account you check in Outlook. Those rules that move mail to local folders will continue to work as before but those that move mail to an IMAP folder might need to be recreated.
Last updated: December 1, 2022
Comments
Contact
Team Name
Help Desk
198 College Hill Road
Clinton, NY 13323
Fri 8 a.m. - 8 p.m.
Sat - Sun 10 a.m. - 10 p.m.


No comments yet.
Comment Guidelines
Please log in to post a comment