Creating Websites Using WordPress
Last updated: February 21, 2019
About WordPress
WordPress is a powerful content management system that has been used for years as a blogging platform. In addition to being a tool for blogging, WordPress can also be used to create websites without the need to write code by hand. If you are interested in creating a website using WordPress, we recommend using Reclaim Hosting due to its ease of use, dependability, and affordability. Before purchasing a domain using Reclaim Hosting, we strongly recommend that you contact someone in Research and Instructional Design either by email (course-support@hamilton.edu) or by telephone (315 859-4877). We will be glad to work with you to discuss such topics as setup options, website creation best practice, and user account settings. To serve as a reference, Research and Instructional Design (R&ID) has created this guide on creating and maintaining a website using Reclaim Hosting. Note that this document is only meant to serve as a brief introduction. For comprehensive documentation on WordPress, please visit http://codex.wordpress.org/Working_with_WordPress.
Getting Started
Go to www.reclaimhosting.com and request and account. At the time of the writing of this documentation the cost is $30 per year for hosting, with the purchase of the domain name (e.g. www.yourname.com) being included in the initial $30 fee.
After your account has been set up, go to the client area and explore the information and options under Accounts. Click on the View Details dropdown menu. This is where you can change your account password.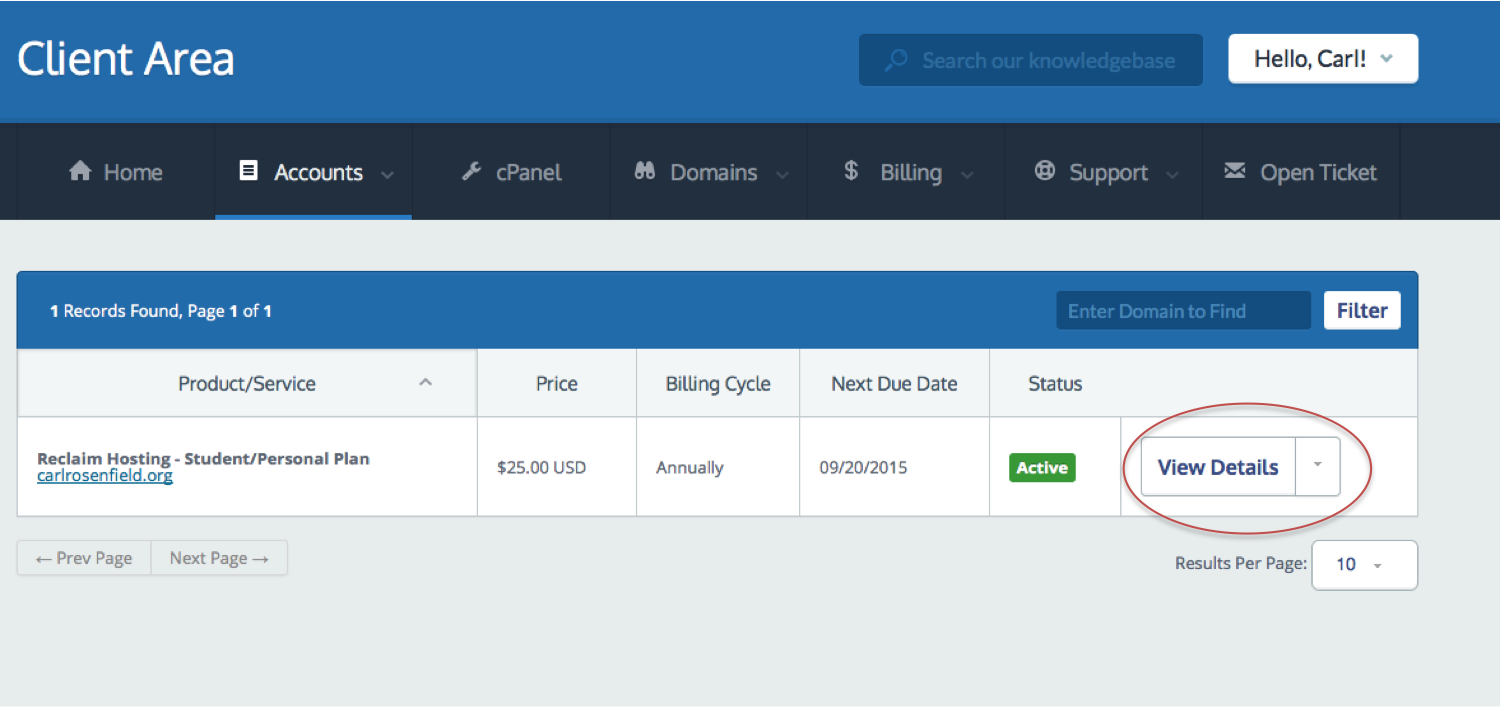
To actually create a WordPress instance, click on the cPanel button in the main navigation at the top of the page. From the list of possible applications to install, select WordPress blog, then click the install this application button.
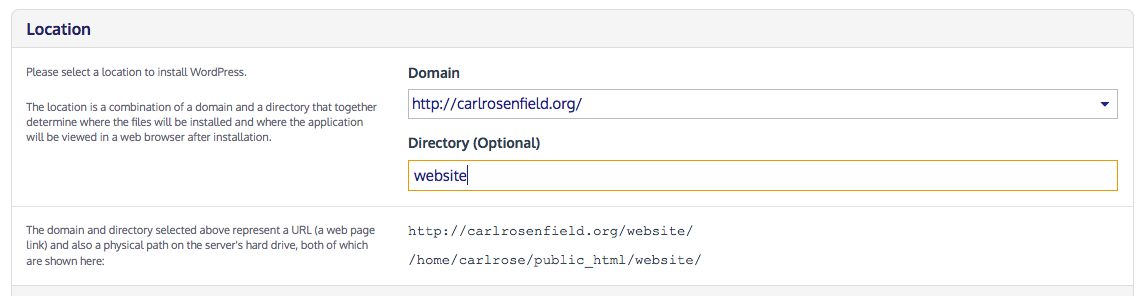
On the resulting screen, you are given the option to install WordPress directly to the root of your domain, or create a sub-directory to contain your website. If you are going to be creating multiple website, the best choice is to install WordPress to a sub-directory.
In the Settings section, change the Administrator Username to a username of your choice, and enter a secure password. Enter your email address in the Administrator Email field, and then enter the website title and tagline. We recommend that you do not enable two-factor authentication. Choose whether to limit login attempts and then select No, do not enable under Enable Multi-site. When you have finished, click the Install button at the bottom right of the page.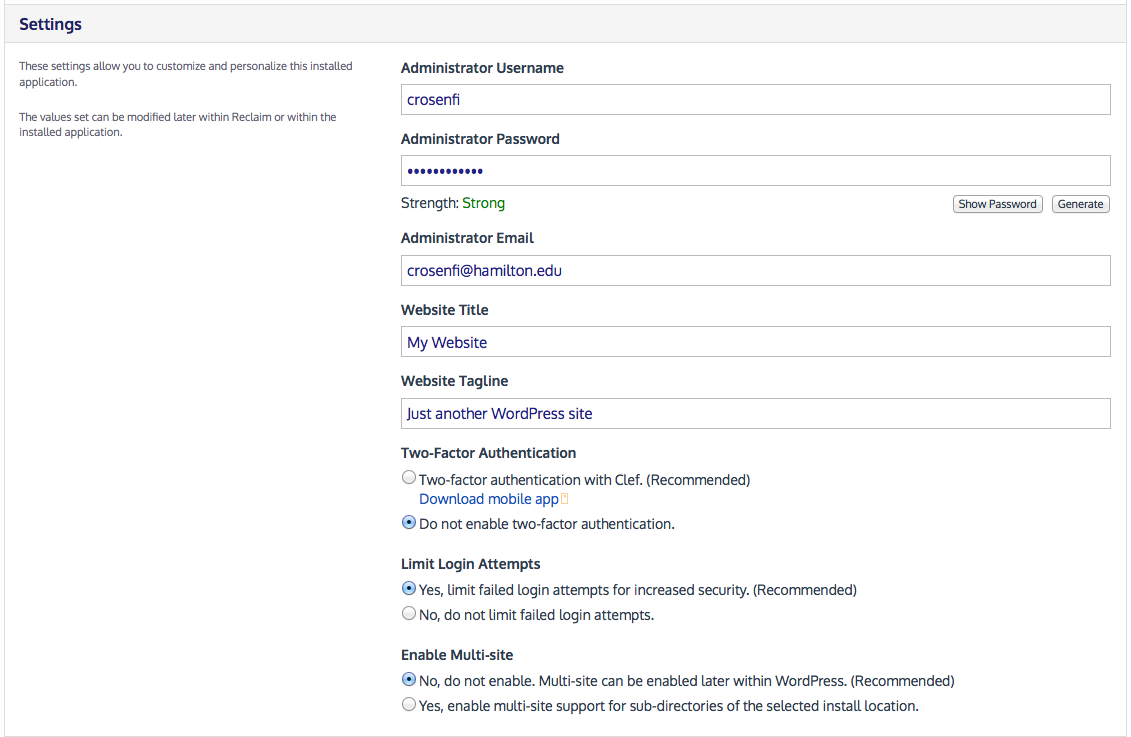
To view or edit your website details at a later time, just go back to the cPanel and click on the icon for your site.
Changing the Look and Feel of your Site using Themes
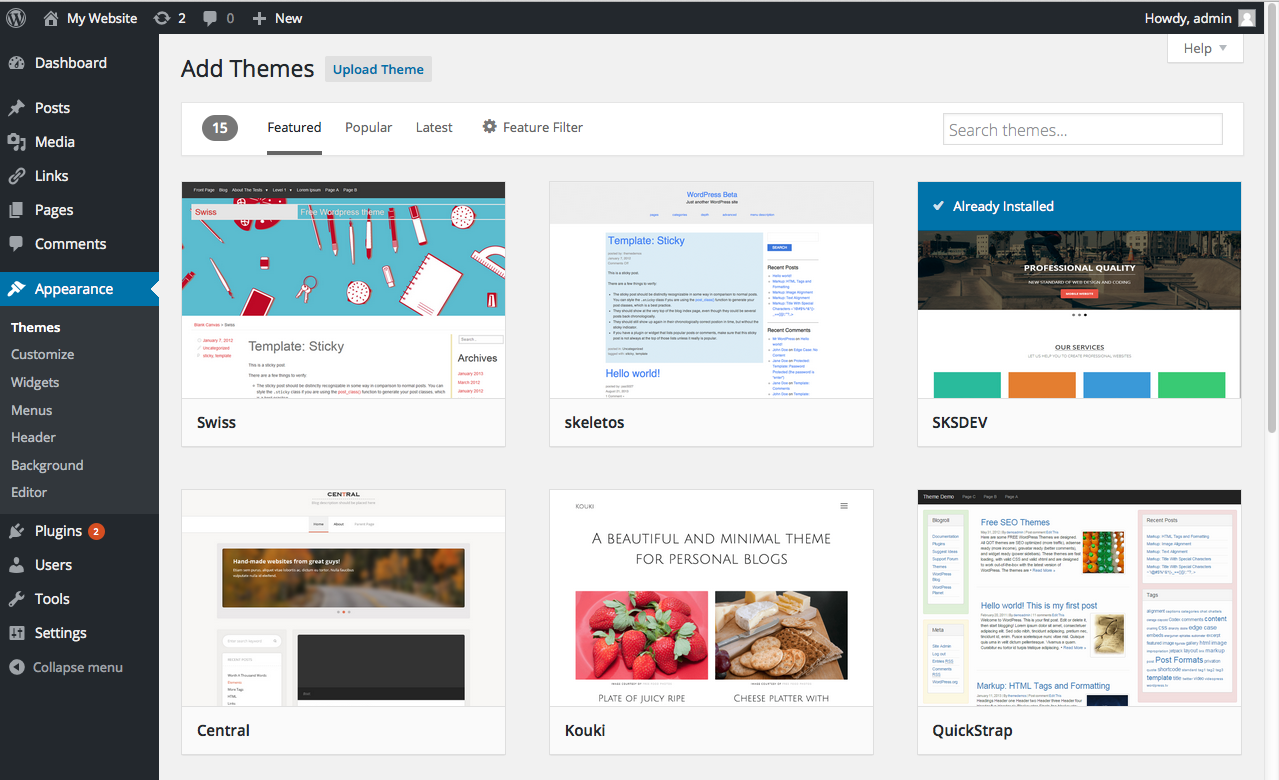
If you would like to change the appearance and layout of your site, you can do so using WordPress themes. There are both free and paid themes available for installation on your WordPress site. To search for, and install new themes, go to Appearance -> Themes in your WordPress dashboard. Click the Add New button to search for new themes. Once you have found a theme you like, simply click on the theme and click the Install button. Once your theme is installed, click on My Website -> Visit Site to review your changes. Note that applying some themes may not be compatible with your menus and pages if they were built using another theme. Also note that many themes require plugins, small helper applications, for WordPress to display your site using that theme correctly. Be aware that changing a WordPress theme can have significant repercussions. Please explore this article to see how your WordPress site may be affected.
Building Your Website
After selecting a theme and looking over the many options on the left side of the dashboard, one of the first things that you will want to do is create some pages and a navigation bar for your website. To do this, first click on the Pages link, and then click on Add New. In the resulting window, enter the name of the page and any text or media you would like to put in the page. When you are ready to save your edits, click on the Publish button. Repeat this process to add any other desired pages to your WordPress site.

Once you have added a few pages to your site, click on Appearance and then click on Menus. In the resulting window enter a name for your menu in the Menu Name field, then click on the Save Menu button. Under Theme locations, check the box next to Primary Menu.
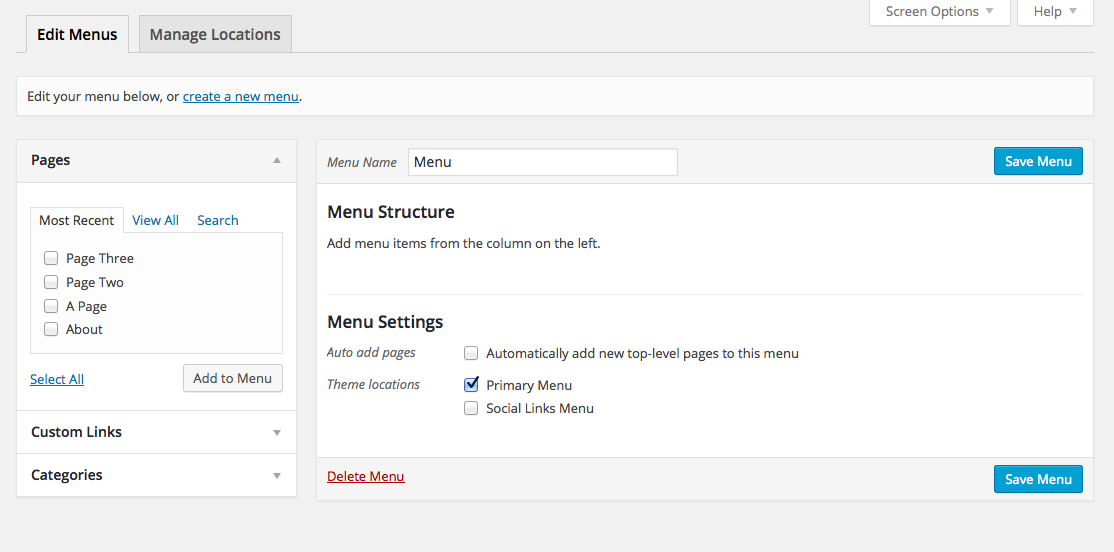
To add your pages to the menu, check the desired pages listed under Pages, and click the Add to Menu button. Once the pages have been added to the menu, they can be re-ordered simply by clicking and dragging the pages to their desired position in the menu. To create a subpage, click and drag the page so that it hovers over the desired top page. Once you are finished ordering your pages in the website menu, click on the Save Menu button to preserve your changes.
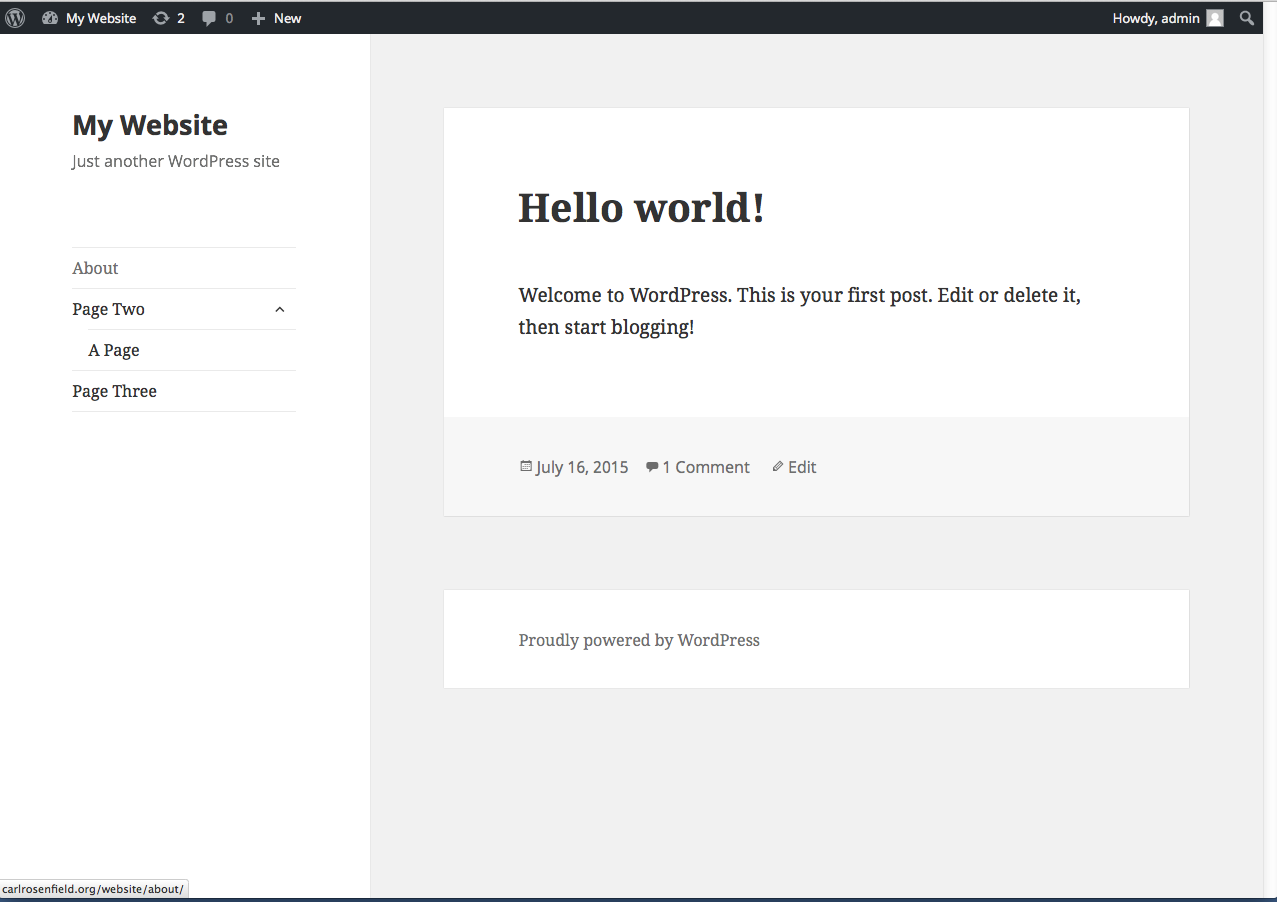
To view what your website will look like to visitors, click on the My Website link in the top left of the page and then click on the Visit Site link. To return to the dashboard, simply click the My Website link again.
Installing Plugins
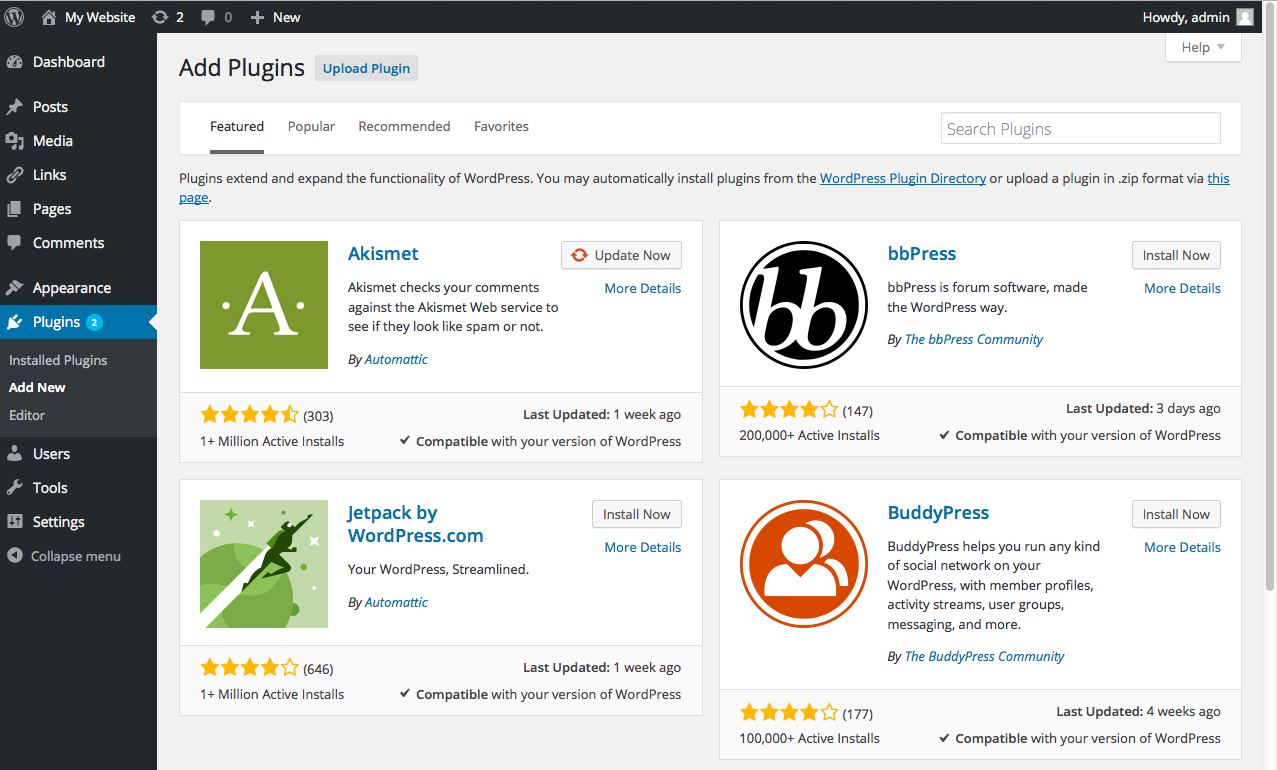
As mentioned above, plugins are small applications that enhance WordPress in some way. For example, the TinyMCE Advanced plugin enables an advanced WYSIWG editor to WordPress. The Page Builder plugin adds the ability to more finely control layout of content within WordPress pages. The Photo Gallery plugin allows you to bulk upload image to display within a WordPress page. There are a huge number of plugins. If you wish you could make WordPress do something, but don't immediately see a way to accomplish your goal, search the plugin repository to see if someone has already provided an easy way to do what you want.
User Accounts
You can give access to your WordPress installation by adding users. Users can be assigned different roles depending on what level of access you would like individuals to have within your site.
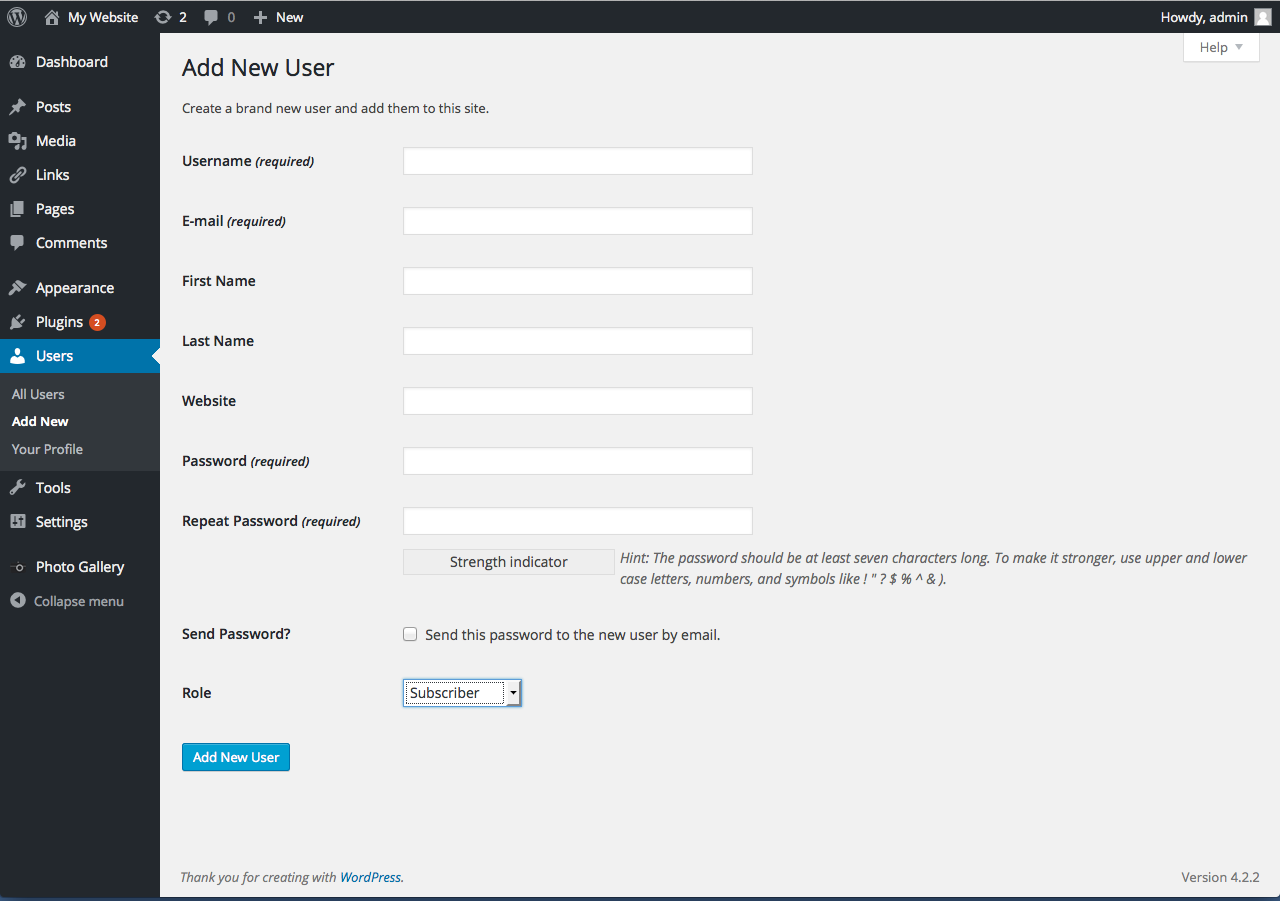
To add a user from the dashboard, go to Users -> Add New. Provide a username, email, and password. You may also add a first name, last name, and website to the user’s profile. You can chose to send the user their password by email (recommended).
Chose a role for the user:
Administrator – This gives the individual all the control that you have.
Editor – has access to all posts, pages, comments, categories, tags, and links.
Author – can write, upload photos to, edit, and publish their own posts.
Contributor – has no publishing or uploading capability, but can write and edit their own posts until they are published
Subscriber – can read and comment on posts and pages
For more about user roles visit: https://en.support.wordpress.com/user-roles/
To edit a user and change their role, go to Users -> All Users. Hover over the user you want to edit, and click the Edit button that appears under their name. This takes you to a page where the user’s profile can be edited, contact and bio information can be added, passwords can be changed, and roles can be set.
Exporting and Importing WordPress Sites from One Server to Another
WordPress has some native exporting and importing tools. To export the content of your site, go to Tools -> Export. This exports all posts, pages, comments, custom fields, categories, and tags as an XML file, which you can import to another WordPress site, or save as a backup for your current site. To import a previously exported XML file, go to Tools -> Import and select WordPress from the list of systems from which you can import.
For a more comprehensive Export/Import process, at the time of writing we recommend the plugin All-In-One WP Migration. This enables you to seamlessly copy a site for backup or to import whole into another WordPress installation.
For more information about WordPress, please go to this site: https://codex.wordpress.org/Main_Page
Comments
Contact
Team Name
Research & Instructional Design
198 College Hill Road
Clinton, NY 13323

No comments yet.
Comment Guidelines
Please log in to post a comment